Saturday 20 August 2011

Drawing Project Plan

I hope you’ve had a bit of time to catch up with the 30 day sketchbook tasks! I promised I’d let you know my plans for a future drawing project so here it is -

A monthly Drawing Project, starting at the beginning of September.

Each project will involve a topic to study and a few ideas of drawing method and technique. You can make this relate to your own current design theme if you wish by combining the two to make use of your time and to expand your personal studies.

The first topic will involve looking at textiles. I have an ulterior motive for this as I am starting a study for a piece of work based on some element of the textile and costume collection at Platt Hall, Manchester. I shall be visiting the Museum next week with my sketchbook and pencil as I have an appointment to take a look at certain samples of their lace collection.

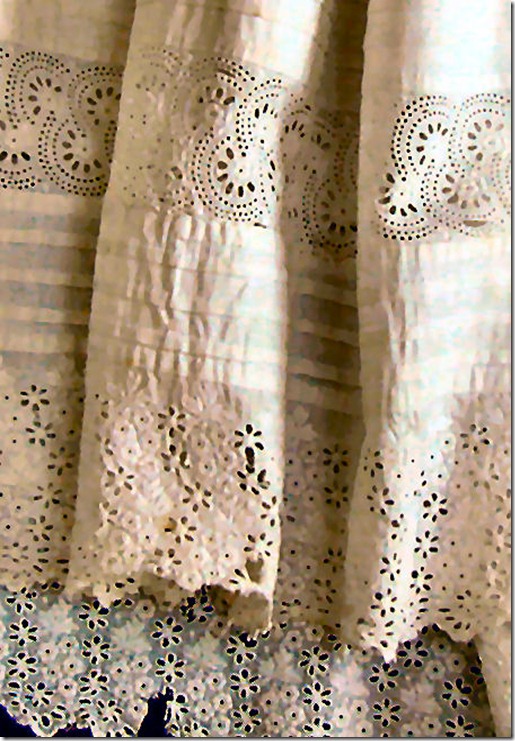
I can’t resist adding an image to this posting. Here is a close up of a little Christening gown a thoughtful friend gave me.

D-dress2

Look forward to seeing you in September!

Monday 15 August 2011

Sketchbook Day 30–stitch

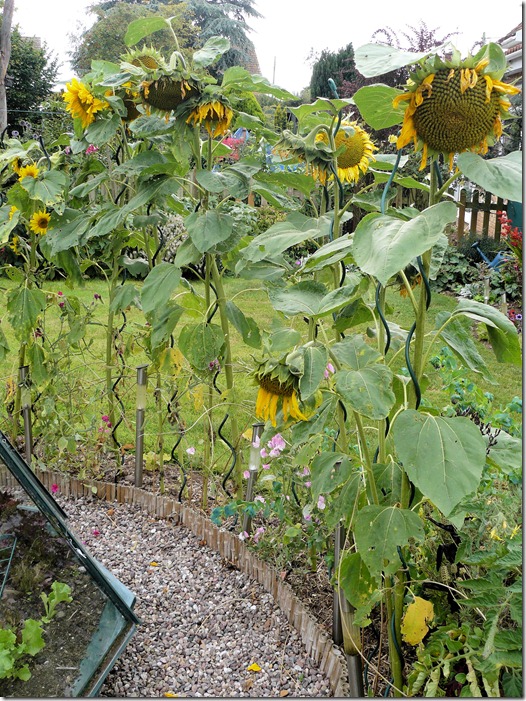
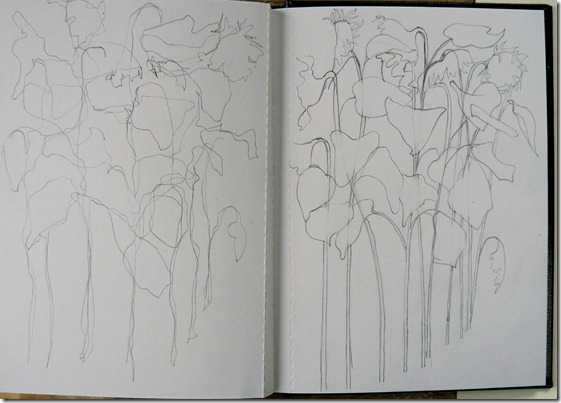
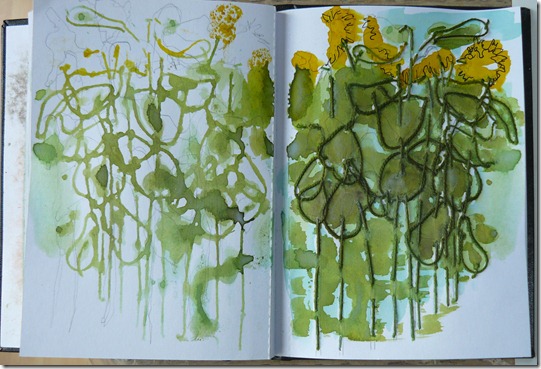
I made some preliminary drawings of my sunflowers with a pencil as this was the first time I have looked at them closely and didn’t feel I knew the shapes well enough to rush into using stitching. You should do the same thing if you are going to choose a new for this drawing. Alternatively, choose something you have previously drawn. The drawing on the right is the first one and then I drew a much freer version on the left page. This ‘freer’ version was only possible after I had ‘learnt my lines’ in the first drawing and is one I much prefer. In case you think that the left drawing was done by looking at the right drawing – not so – it was done, looking at the sunflowers from the same position and trying not to look down at the page but only at the shapes ahead of me. Try this yourself and see what you get. (I wish I hadn’t done it on the opposite page – see comments in ‘tips’.sunflower9
TODAY’S TASK –

sunthreads

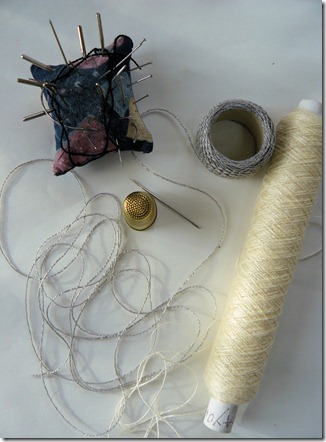
Choose a hand sewing thread rather than a machine thread. This should be a pale colour and one that will happily accept colour such as a cotton or linen thread. (Wool and synthetics to be avoided for this.)

Make sure to use your thimble.


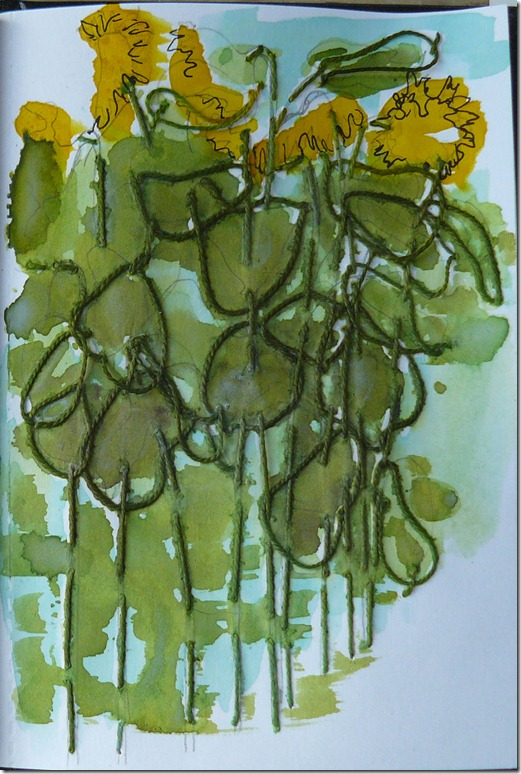
I forgot to take a photo of the stitches before I added the colour – too eager to see what it would look like with colour! So I hope you can see them clearly enough in the image below. I used the same thread throughout, making long straight stitches along the stem lines and loopy chain stitches for the leaves. In hindsight I should have stitched the edges of the sunflower heads and I might well do that later. Looking at my drawing below now I realise that I was probably more interested in the huge droopy leaves!
sunflower7

Add a liquid colour to your stitch drawing such as inks or water colour. I used a pale colour first to act as a background and then added stronger colours to the leaves. It’s interesting to notice how the thread changes to a much stronger colour than the paper and how a stitch has acted as a sort of reservoir for the liquid in places.

Take the opportunity to ‘take a print’ while it is still wet. The printed stitch is a delight and adds lots of ‘oomph’ to my freer drawing on the right.
sunflower7

The two drawings below (scroll down – I had made myself a very long sketchbook!) were done last year on a canal boat holiday in Le Canal du Midi in France. I sat on the browe and drew the view of the canal in front of me each day for a whole week. Each of these drawings were folded in half and the wet paint (from my Kohl-i-Noor paint box) was allowed to print onto the folded half. The top left hand drawing was made using wax resist from a candle and long horizontal stitches. The top right drawing is the reverse side of the left hand. So you can see that one drawing created the base for four others. Further colour was added to the three ‘extra’ drawings of course.

river3    river2

Future ideas for stitching for the next few days -

- Add hand stitching in coloured thread to the stage above right and to the print it made on the page behind (see image at the bottom of this blog).

- Use machine stitching instead of the initial hand stitch or add it to one of the prints – the opposite one or the one behind.

TODAY’S TIPS – Leave a clear page opposite and behind if you wish to take a print but don’t want it to risk it covering a drawing.

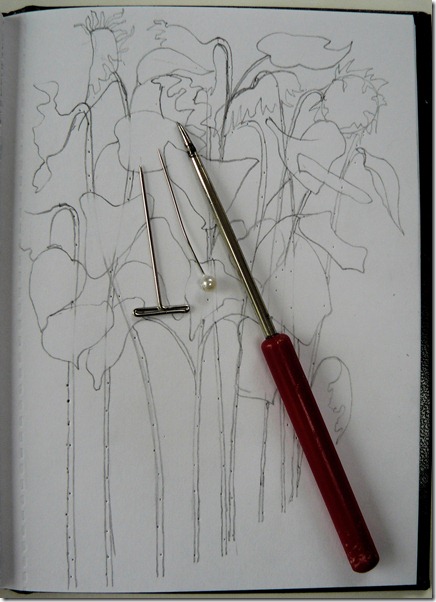
Make holes in your drawing before you stitch with something easy to hold such as a stiletto or a pin with a large head or even make your own stiletto by (carefully) pressing a needle (eye first) into a wine cork. Place a piece of scrap card behind if you don’t want your holes to go through a few pages.
sunflower 8

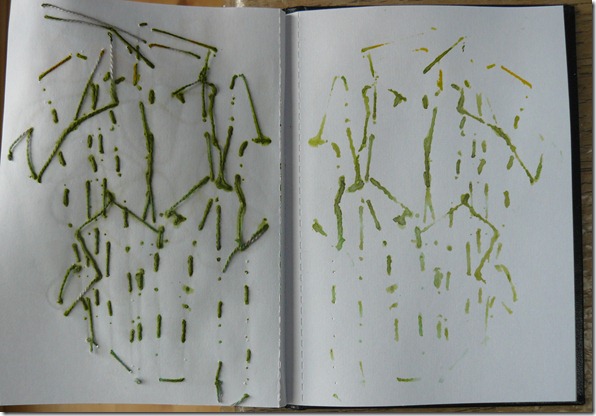
Take a look at the stitching on the reverse side of your page and also the print this has made. I can see further drawing potential in the print – perhaps adding stitching in coloured thread.
sunflower6

Future Sketchbook plans – I shall continue to add drawing tasks to my blog and thank you for all your encouragement from Distant Stitchers as well as others I don’t yet know.  It will not be on a daily basis but it will have a different format and be at a slower pace, also as a result of your feedback! I have improved my drawing skills by doing something every day and my cat has enjoyed my company as her basket is on my large worktable.

I will post my plan for the next stage in a few days time. This will give you all a chance to ‘catch up’ with the daily tasks and give you an incentive to keeping an eye on my blog. Don’t miss it.
Sunday 14 August 2011

Sketchbook Day of rest – sunflowers but no sun shine!

If you have been trying to leave messages on my blog and been unable to, please know that you are not alone. Here is a message from Catherine via email as I promised to paste it here as well.

"Blogger won't let me post comments on your blog, which I've tried to do throughout.  I just wanted to say how much I am enjoying the project.  I am too far behind to really feel a part of it with everyone else (the pace is hectic - could you post just every second day next year?) but I'll continue with it in my own time.
It has made me determined to keep a small sketchbook all the time now and draw something each day.  Your guidance has given me new ideas and expanded my view of what drawing is.  Thank you for that.
Another great pleasure has been to see your own beautiful drawings as well as those of other students.  I am quite gobsmacked at the talent there is around!  It has been a tremendous amount of work for you, but very much appreciated."
Thank you for your lovely comments Catherine.

I've also been unable to leave messages to several of you. Will try to find time to send a complaint to 'Blogger'.

In the meantime - I've been taking a close look at my sunflowers by doing some line drawings in my sketchbook, ready to do some stitching.

sunflower5

Saturday 13 August 2011

Sketchbook Day 29–swirling ellipses

I enjoyed making the two short videos yesterday and they are now on YouTube as well! I’ve also been able to add my demonstration video to Day 13 so you can now see it here on my blog as well as the Distant Stitch website.
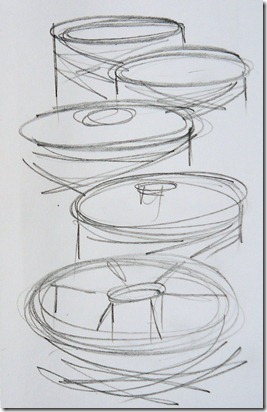
I hope you’ve been enjoying the method of monoprinting. I have found it quit addictive as its such a quick process it encourages you to do ‘just one more’ until the paint runs out! Speedy drawing is just what you need to get your eye and hand ‘in’ for curved shapes particularly elliptical shapes. So a couple of extra ideas using this technique today.
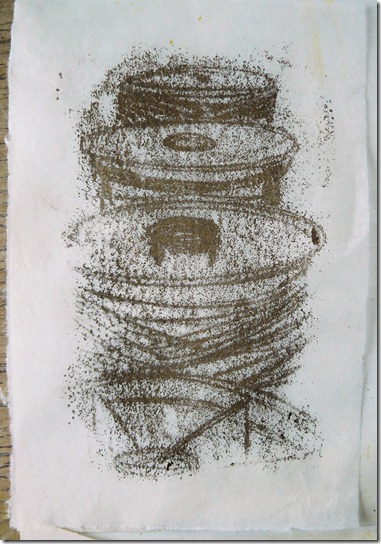
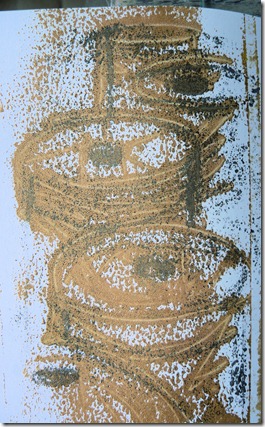
Have you looked at ‘ferrinbroderie’ to see Jenn’s monoprints from yesterday? A lovely collection of sensitively observed elliptical shapes. I notice there is very little paint between the lines in your drawings Jenn – perhaps this is because you have used separate thinner paper than your sketchbook page? The monoprint drawing below has been done on ‘tissuetex’ or ‘repair tissue’ but still seems to pick up quite a bit of the paint from the plastic sheet – although I do like the way it gives the drawing a sort of hazy, mysterious look. A tip from you please Jenn?
mono2-1
TODAY’S TASKS -
TASK 1 – Add monoprinted lines to a previous drawing. Work with a different colour – preferably a darker one. You will already have the lines of this print on the back of the page so it should be easy to acknowledge the lines already drawn. Use this second layer of lines in different ways;
- Add lines to emphasise certain areas of your shapes that suggest a shaded or darker area.
- Add lines to give clarification of detail, pattern or just where the previous print didn’t pick up enough paint.
- Add the same lines again, but move them over a bit to act as a sort of over-print suggesting ideas of transparency or floating layers.
- Add a completely different shape add to the composition. For instance you might have drawn a wine glass yesterday – so now add the bottle!
mono2-3mono2-2  
These two drawings above where made onto yesterdays drawings to accentuate some of the features in the cotton reels.
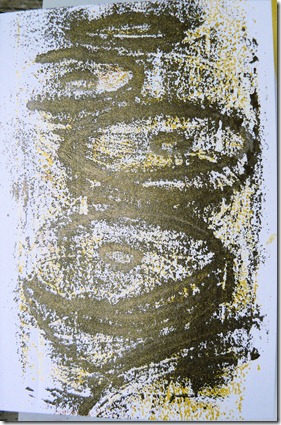
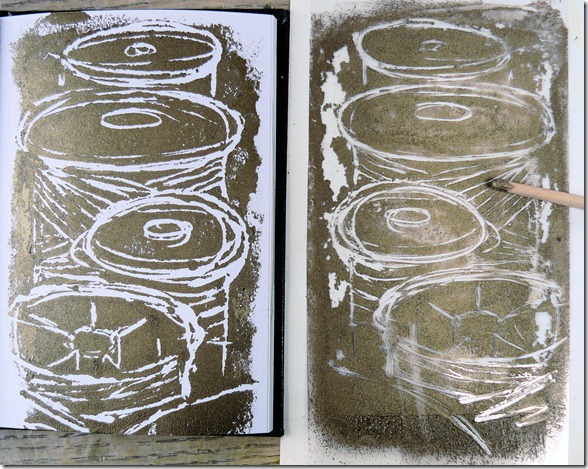
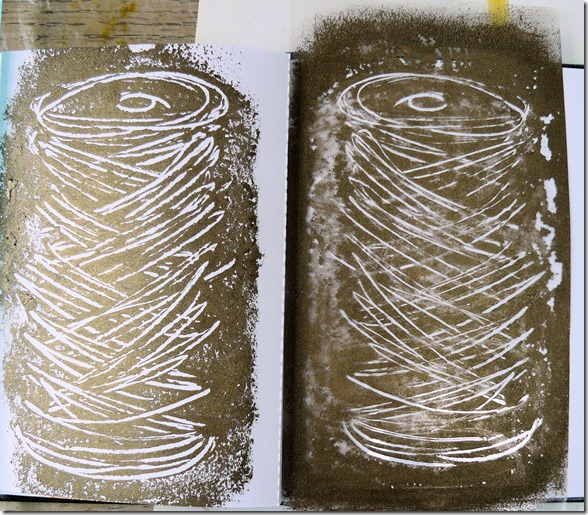
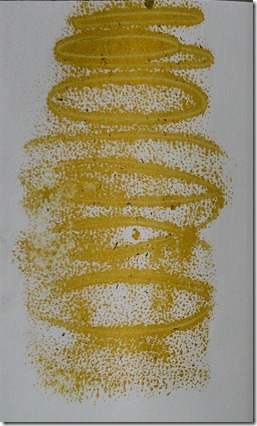
TASK 2  Draw into the inked plastic sheet and then press onto a page to take a print. This will produce a negative drawing whereas the drawings made by pressing through the paper produce positive lines.
The plastic sheet is on the right in the two examples below. It has been rolled with paint and then drawn into with the end of a paint brush.
The plastic was then placed face down onto a sketchbook page and a clean roller was used to press it firmly down.
mono2-5
mono2-4

TODAY’S TIPS – Mix your paint with a drop of washing-up liquid to keep it from drying too quickly. Mix this thoroughly before applying it to your plastic /glass sheet.
I have used a flexible piece of plastic to roll out my paint here. It was cut from a plastic sheet that covered the screen of a new computer – waiting for just this purpose!
You can use anything you like to draw with – a fine point or a very wide point, a textured point (old fork perhaps). I like your idea, Helen, of using the tip of a mini screw driver to make marks (see Fibrenell).
If you don’t have a second roller – use the back of a large spoon.
NEXT TASK – The next drawing day on Monday will be the last of this series and will involve stitches, so my ‘day of rest’ tomorrow (Sunday) will allow me to indulge myself with some stitching in preparation. If its a dry day I’m going to stitch looking at my row of 20 sunflowers which are looking quite droopy in this glum and wet weather.

Friday 12 August 2011

Sketchbook Day 28 – monoprinting

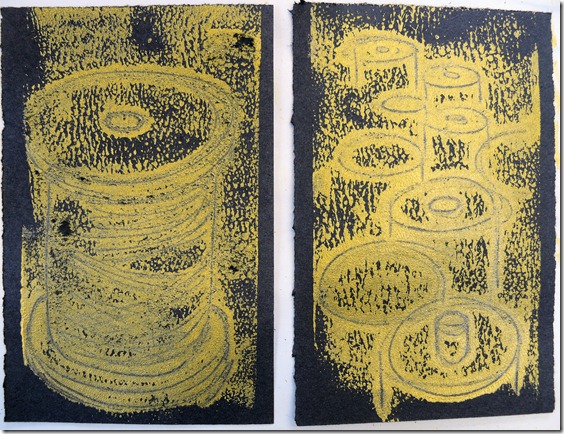
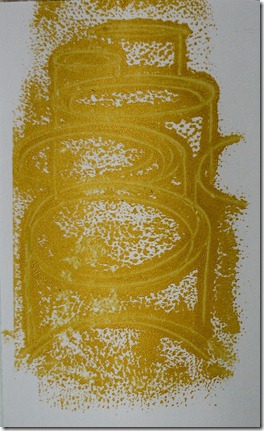
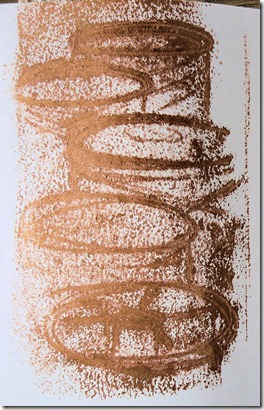
The method of monoprinting is used by well-known artists of this century including Paul Klee. It creates an attractive furry line and gentle tone between the lines. The monoprints on black paper below are drawings of the cylindrical shapes of reels of machine threads.These can be glued into my sketchbook when dry.
mono6
Paint from a tube (rather than a liquid) is rolled onto a smooth surface such as glass, Plexiglas/Perspex or a sheet of flexible plastic as used by Ruth Issett in last year’s Summer School workshop.Your paper is placed onto this painted surface and lines drawn on the paper surface to pick up the paint below. If working in your sketchbook, check that the painted surface can be slipped under a page.  Take a look at the two short videos to demonstrate monoprinting. You can also see them on the Distant Stitch website .

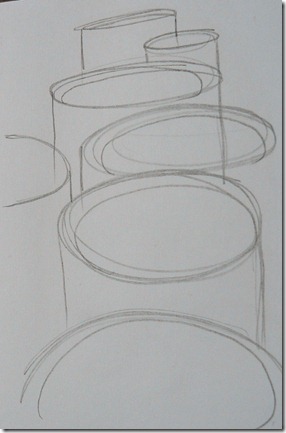
TODAY’S TASK – Find some cylindrical objects such as crockery, cotton reels, tins. You will be looking at the elliptical shapes that circles form when viewed from an angle. To draw these with any sense of ‘flow’ you’ll need to practice drawing these shapes, noting how the more distant circles show more compressed ellipses and the closer circles show more open ellipses.
mono2 mono3
The ‘missing’ elliptical top in the drawing below was drawn with a old biro and the rest was drawn with a pencil – much easier to see what you’ve drawn!
mono3  mono1 
mono4mono5
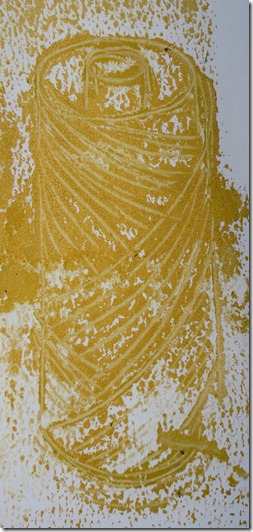
TODAY’S TIPS - Thinner papers work best so you might like to choose papers like repair tissue (Tissutex) and then attach to your sketchbook afterwards. I used the actual pages of my sketchbook to see how the thicker paper would work. It tends to pick up more of the paint underneath which I also found gave interest to the linear drawing.
A a couple of drops of washing up liquid mix well into your paint to encourage it to roll out smoothly and to stay wet longer.
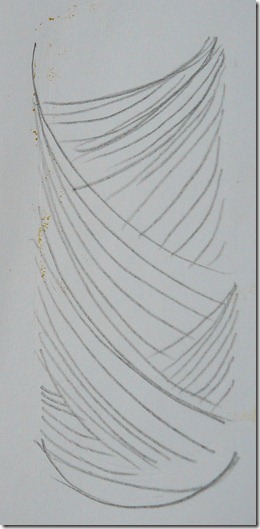
To draw elliptical shapes, don’t grip your drawing implement near the point and don’t let your hand touch the paper to rest on it. Let the flowing line be made from your whole arm and not just your wrist. Practice this until you can draw them without any awkward angles. Don’t worry if the first swirl isn’t right – keep going round and round until you find the right shape. Your eye and arm will be ‘learning their lines’ so that the marks you make in the monoprinting process can look good.The monoprint drawing below was a practice one to try making the different sizes of elliptical shapes.
mono2
Tomorrow – more monoprinting variations, so wash your equipment thoroughly and keep it at the ready!

Thursday 11 August 2011

Sketchbook Day 27–carbon copies 2 or tangled legs!

A request from Anne to do some drawings by monoprinting will be on its way tomorrow, so look out a small sheet of glass or plastic. A piece of old plastic wallet/envelope will do. This method is related to the ‘carbon copy’ method so thanks for mentioning it Anne. I was also inspired when I was saw Tracey Emin’s monoprinted drawings at the Hayward Gallery recently. If anyone else has a request for a particular method of drawing or a particular difficulty you need help with, please leave me a message either on my blog or yours or by email and I’ll try and oblige.

The Project will finish after day 30 and might continue on a weekly basis if requests indicate you’d like me to continue.

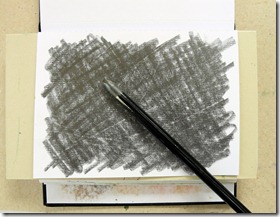
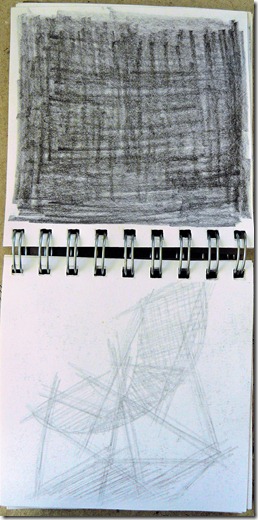
TODAY’S TASK – As the headings suggests, today’s method is a variation on carbon drawing. Perhaps this method is a more basic than yesterdays and should have been placed before it as it uses the idea of creating a carbonised surface with a soft pencil or a graphite stick to act as the carbon surface.

carbon9

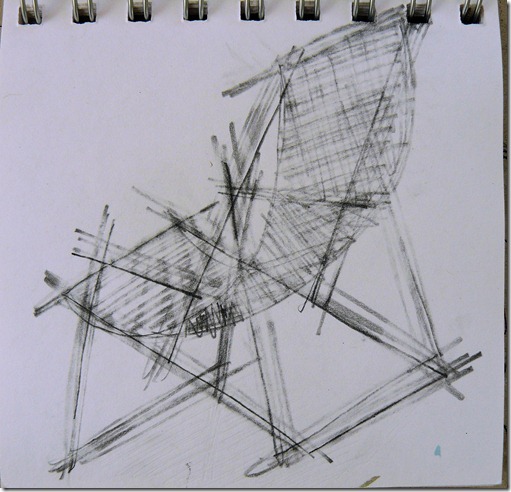
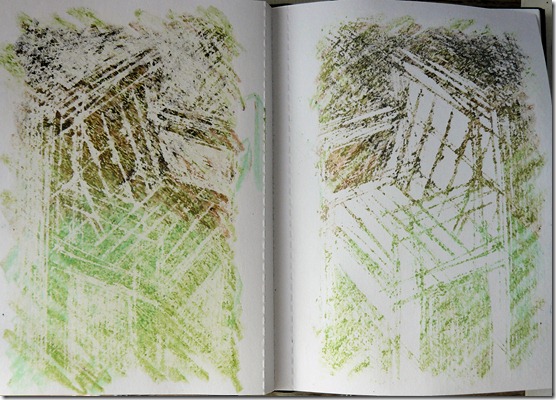
Draw on the next page surface with heavy pressure, using a hard, well sharpened pencil in the same way as yesterday’s method. Remember that the carbon drawing of the deckchair in the image below was done on to the back of that page.

carbon5

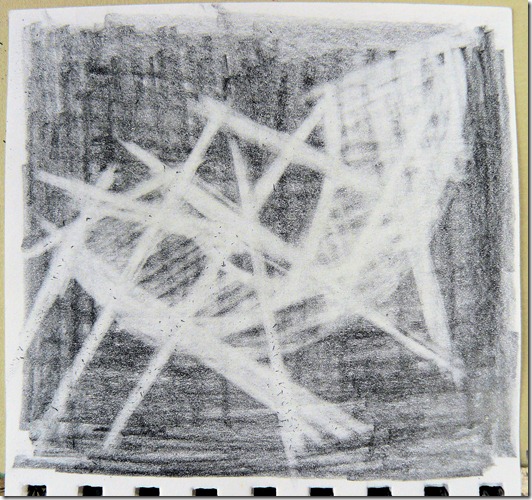
Note that the carbon surface does not seem to reveal an ‘after image’ of your drawing, BUT you can now use it to do a drawing with your eraser. I chose one on the end of a pencil as this was quite hard and had an edge to make narrow lines. Oh, those legs!

carbon7

A second bonus to this method is that the very heavy handed drawing you made to create your carbon drawing can also be worked into to make more interesting – again with the eraser. Use it to break up the solid, heavy pencil lines – just scribble over them with the eraser. I also added a few lines with my fine pen. Try this yourself to transform it from an over-heavy ‘beginner’ style into a light,’confident’ style.

carbon6

TODAY’S TIPS – Place a piece of card behind your pages when scribbling with the pencil/graphite stick to stop unwanted indentations passing into neighbouring pages. Notice slight unwanted indentations from a previous drawing in the carbonised surface above!

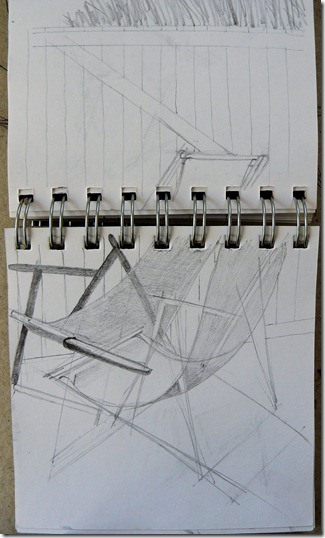
Before making your drawing with heavy pressure to pick up the carbon, place a card below your drawing page and draw your lines lightly first to help you get it right. Then remove the card and go over your lines with a heavier pressure. An alternative is to draw your object on a separate page to ‘learn your lines’ first. Here’s a pencil sketch done prior to the carbon drawing to help me make sense of those deckchair legs!

carbon4

Final tip – don’t draw a deckchair!


Wednesday 10 August 2011

Sketchbook Day 26–carbon copies

Thank you to Jenn for her suggestion of using a bamboo tip to get curved lines. I wonder if it would work in this carbon drawing method? Although this task is related to objects with straight edges, some of you might prefer to draw something with curves instead?
TODAY’S TASK – Draw an object such as a table, chair, box, greenhouse, building – anything in fact that is 3 dimensional and has lots of straight lines. I hope you have been practicing as a result of yesterday’s task.
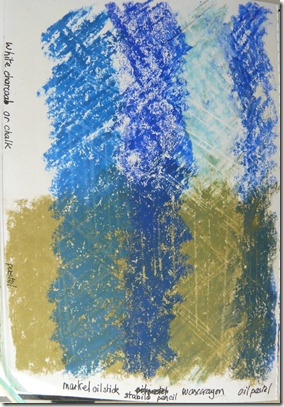
Try this method of indirect drawing – you scribble two layers of media on the left hand page. The principle of this carbon method is to build a layer of chalk onto the paper surface and then another layer of crayon. The crayon will not stick to the paper so can easily be lifted in the drawing method.
I suggest you make an initial experimental surface to find out what media you have available works best. If you know of other media, please let us all know.
I covered the top half of the page with a white chalk-like charcoal and the bottom half of the page with a coloured pastel. Then added second layers in vertical bands of 4 different ones I had – oil pastel, wax crayon, stabilo pencil and Markel oil stick. You can judge for yourself which ones worked best.
 carbon1
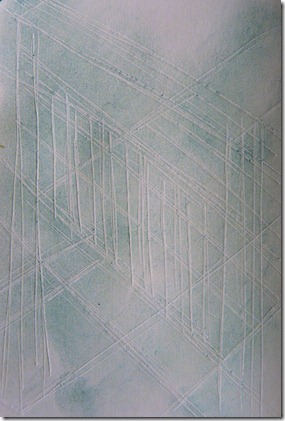
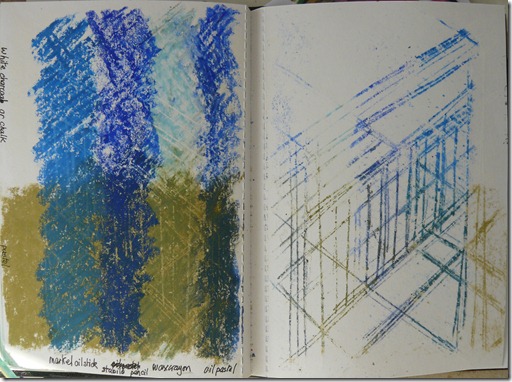
Turn your page over and make your drawing on the left hand page of this next  pair of pages, using a firm, rounded (not sharp) point such as a biro. I used a ‘spent’ biro so that it only made deep colourless lines in the paper surface which I then smudged with a coloured pastel to show it better – I hope you can see the lines.
My drawn lines show the lines of my garden chair. I have taken each line out to the edge of the page. This gives the drawing interest and also allows you to check that your lines are tapering towards the top area – remember that shapes appear to get smaller as they are further from us – AND that all up-right lines remain upright!

carbon3
Turn your page back and look at the way your pressured lines have picked up the top layer of media from the opposite page. The wax crayon seems to have transferred least well, even though that is the traditional crayon to use.
carbon2
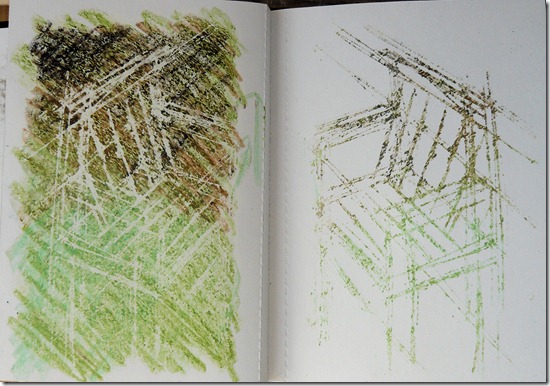
The drawing below is of a different view of my garden chair. I used white chalk and a layer of wax crayons on top as my carbon page.
chair1
TODAY’S TIPS – Don’t scratch the lines as in a previous method – use a ball point pen so that you just make a deep mark with a lot of pressure.
You can transfer more of the ‘carbon’ colour by more drawing on the back of the next page of course. I continued with this one by scribbling over all the negative spaces around the chair. The carbon copy becomes a drawing in its own right and of course shows the positive areas of the chair – two for the price of one again!
chair2

Tuesday 9 August 2011

Sketchbook Day 25 - getting into perspective

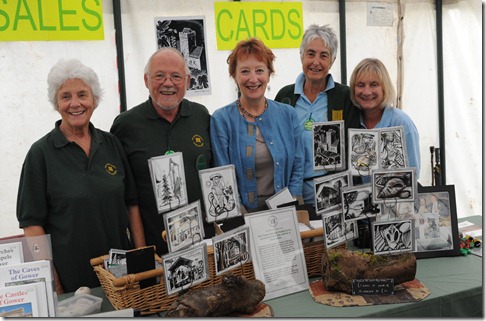
My few days away were spent near Swansea, at the Gower Show, where the Gower Society were launching a re-print of my parents' designs of the stunning landscape and historical buildings of the Gower peninsular. My parents were founder members of this society so my brother and I were thrilled to be invited to join some of the current members for lunch and be given a set of cards.
DSC_4033
TODAY’S TASK - The next few drawing days will help you to use line in interesting ways and to look at a way of drawing 3D objects using straight lines. Several of you are probably know how to use the principles of perspective, so please challenge yourself to draw more complex objects or objects from unusual angles. I hope these basic tips in today’s lesson will help those who have no experience, but nothing beats looking very hard at your object – with your brain as well as your eyes.

TODAY’S TIPS - Remember 2 things -
Shapes appear to get smaller as they get further from you. Further away is towards the top of the page. Closer to you is at the bottom of the page.
Very important - all upright shapes stay upright!

I drew these without a ruler so try this yourself as this is not a geometry lesson. Press lightly with the first line to judge whether it looks right; make changes, again using a light pressure. Make your line darker when you feel it is right. No need to rub out the lighter lines as these will all add up to being part of the character of your sketch. I have rubbed out a few lines in these drawings below to make them less confusing as a teaching aid.

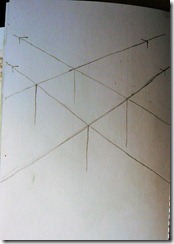
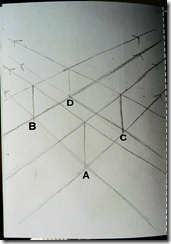
The basic plan – Draw 2 lines at an angle from one side of the page to the other that are not quite parallel but seem to taper slightly in the direction of the arrows in this drawing. Draw another two lines that taper in the opposite direction, with arrows facing the other direction.

Left image - Where these 4 lines cross, draw lines in a downward direction. Make these parallel to the left and right edges of your page. These lines will indicate the legs of your imaginary table – remember – all upright shapes stay upright!

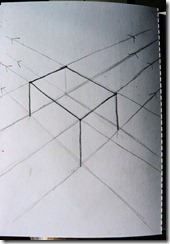
Middle image – Decide on the height of your imaginary table by marking a point  [A] on the near leg. Draw 2 more tapering lines through this point one in one direction and the other in the opposite direction. These two new tapering lines should follow the taper of the first sets of tapering lines you drew. As these new lines pass through the lines for the left and right legs, these points will indicate their base [B and C].
From these points [B and C], draw 2 more tapering lines, again following the direction of the other lines, but still trying to create a slight taper as the lines move towards the top of the page. These 2 lines should meet at the base of leg D. If this doesn’t happen, check that you have made all the tapering lines look as if they are disappearing into the distance by very gradually looking as if they would all join into a point, well off your page, to the right and a point to the left.
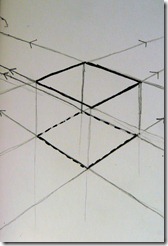
persp3 persp5Bpersp6
Right image – Draw bold lines to show your imaginary table or perhaps a box.
You will notice that this ‘table’ or ‘box’ looks as if it is being viewed from a height – as if you are looking down at the table from the ceiling. So I suppose it looks more like a brick or box shape as we are more used to viewing smaller objects from above.

To change the angle of view, you need to change the angle of your tapering guidelines. Notice how the lines in the drawing below are different to the ones above and produce a table/box shape viewed as if you are looking at it from a lower position.
persp7
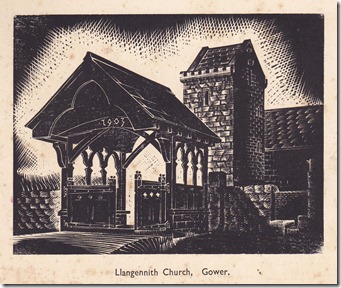
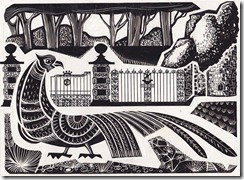
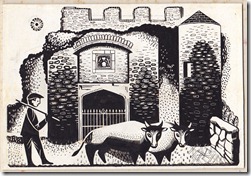
Perhaps you can get the idea from these two woodcuts by my father, Edward Martin – one viewed from high up, looking down into the church in Cheriton Valley on the left and on the right, looking upwards from the road towards the church in Llangennith
cheritonllangennith

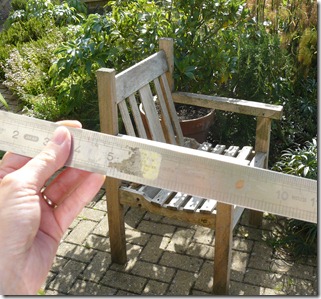
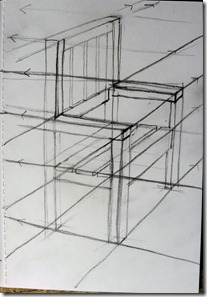
To help you gauge the best angle for a particular drawing, hold a straight edge up in front of your eye. You’ll notice the ‘learning’ drawing on the right is not totally accurate as I have simplified it to help me understand it first. I was pleased to be able to make the legs and arms look solid.
persp9 persp8
Tomorrow I’ll use my experience of drawing these lines to make drawings that are freer and more characterful of my garden chair. I hope you’ll find this preparatory stage intriguing.

Saturday 6 August 2011

Sketchbook Day 23–a few away-days


It was lovely to meet Julia Green, a Distant Stitch student that some of you will have met at Summer School 2012 in Ruth’s workshop. Julia was one of my students at the Gilding the Stitch workshop in Solihull, Birmingham yesterday.

I’m off again this morning for a couple of days to an area of South Wales that is my favourite place and was where I spent my childhood – the Gower peninsular, near Swansea, the first area to be awarded the title of ‘Outstanding Natural Beauty’ in the UK.

My parents who were both artists and designers (as well as mother being a well known embroiderer) contributed drawings for a regular publication by the Gower Society. These have just been re-printed as greetings cards for fund-raising. My brother, husband and myself are invited to an event in Gower to launch this tomorrow. I thought you might like to see an example of their work. Below are two scenes around Penrice castle which is where this event will be held tomorrow – in a marquee rather than the castle ruins I hope!

penrice1  penrice2

SKETCHBOOKDAY 24 – Away in Gower

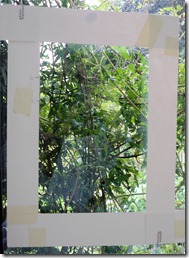
As I’ll be away today and tomorrow, this will be two days of rest. A pic to give some interest to this day - I finally managed to get a drawing I was pleased with of the clematis growing over my window. It was a rainy day so I worked from the lines within a paper frame stuck to my workroom window. Isn’t it good to get a printed version on the opposite page. This could also be worked into.

agarden5 c2

I was interested to hear that you have also been using Windows Live Writer to set up the info on your blog Daniela. You mentioned that the images don’t enlarge. I’ve checked this on yours and can see that this is the case. I’ve checked it on mine and they seem to enlarge, but not hugely.

Looking forward to the next sketchbook day on Tuesday. See you all then!

Thursday 4 August 2011

Sketchbook Day 21 and 22–sgrafitto


I am venturing north to Birmingham to day to do a workshop with Sutton Coldfield Creative Stitchers at their exciting ‘Stitched-Up’ summer event. Hope to meet up with Maggie Grey and Sue Rangeley and others. My next blog entry will be on Saturday so you have two day’s worth here. It’s raining today so if it’s the same with you, perhaps you’ll need to place your frame onto a window or use an indoor plant.

A very useful blogging tip from Kay Lockie – use Windows Live Writer to write your blog. I’m using it now – just like a Word programme - it’s so much easier than doing it in ‘blogger’. If this works, you must all download it.
SKETCHBOOK DAY 21 – Trial and error

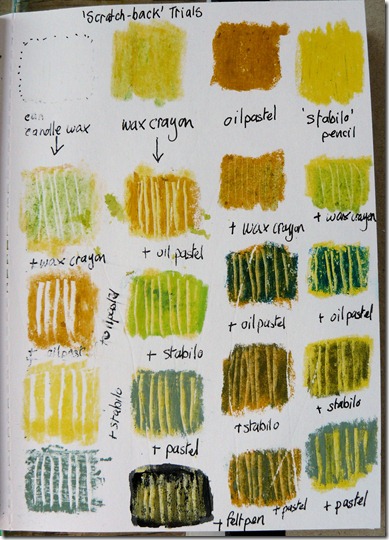
TODAY’S TASK – Explore different media to find the best combination to make layers for scraping back (rather than scratching) – politely known as the technique of sgrafitto. Not all combinations will work. It is based on the principle of placing a layer of colour on top of another one and then scratching back to reveal the colour underneath.

TODAY’S TIPS – Do a tester page as this saves you colouring in vast areas only to find you can’t scrape it back!

The secret is to use a ‘slippery’ medium in the bottom layer so that the top layer doesn’t mix in when you add it.
Some media like to be left to ‘dry’ before adding the second layer.

btrials

SKETCHBOOK DAY 22 – building up and removing

I did this yesterday, outside in the lovely sunshine - I’m sorry that your working week has been sunny and the weekend a wet one Anne.

TODAY’S TASK - Prepare a coloured ground two layers of colour media.

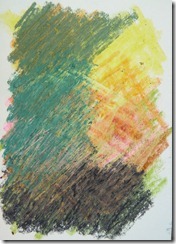
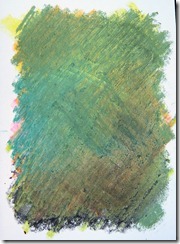
TODAY’S TIPS – You can use more than one colour in each layer. The image below shows the ground colours of wax crayons which are going to be the colour of my scraped lines. The top layer of pastel crayons will be the colour of my background. Difficult to get your head round, but easier when you take time to think about it and actually do it.

b4   b4

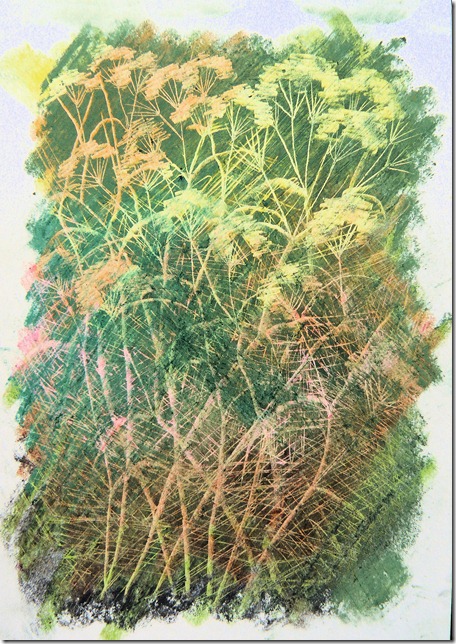
This is the result – the tall stems of fennel with their feathery fronds and umbrella formation seed heads. Too much detail to give in such a small area of my sketchbook page so I just ‘suggested’ the effects.b4

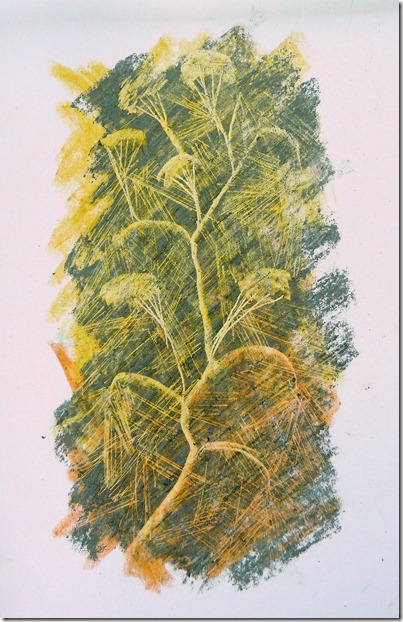
I then did a simpler study of the fennel as it is such a beautiful structure. (Curved lines are really difficult! Any tips?)

b5